> ## Documentation Index
> Fetch the complete documentation index at: https://docs.tunnel.dev/llms.txt
> Use this file to discover all available pages before exploring further.

# Quick Start

> Get started with Tunnel

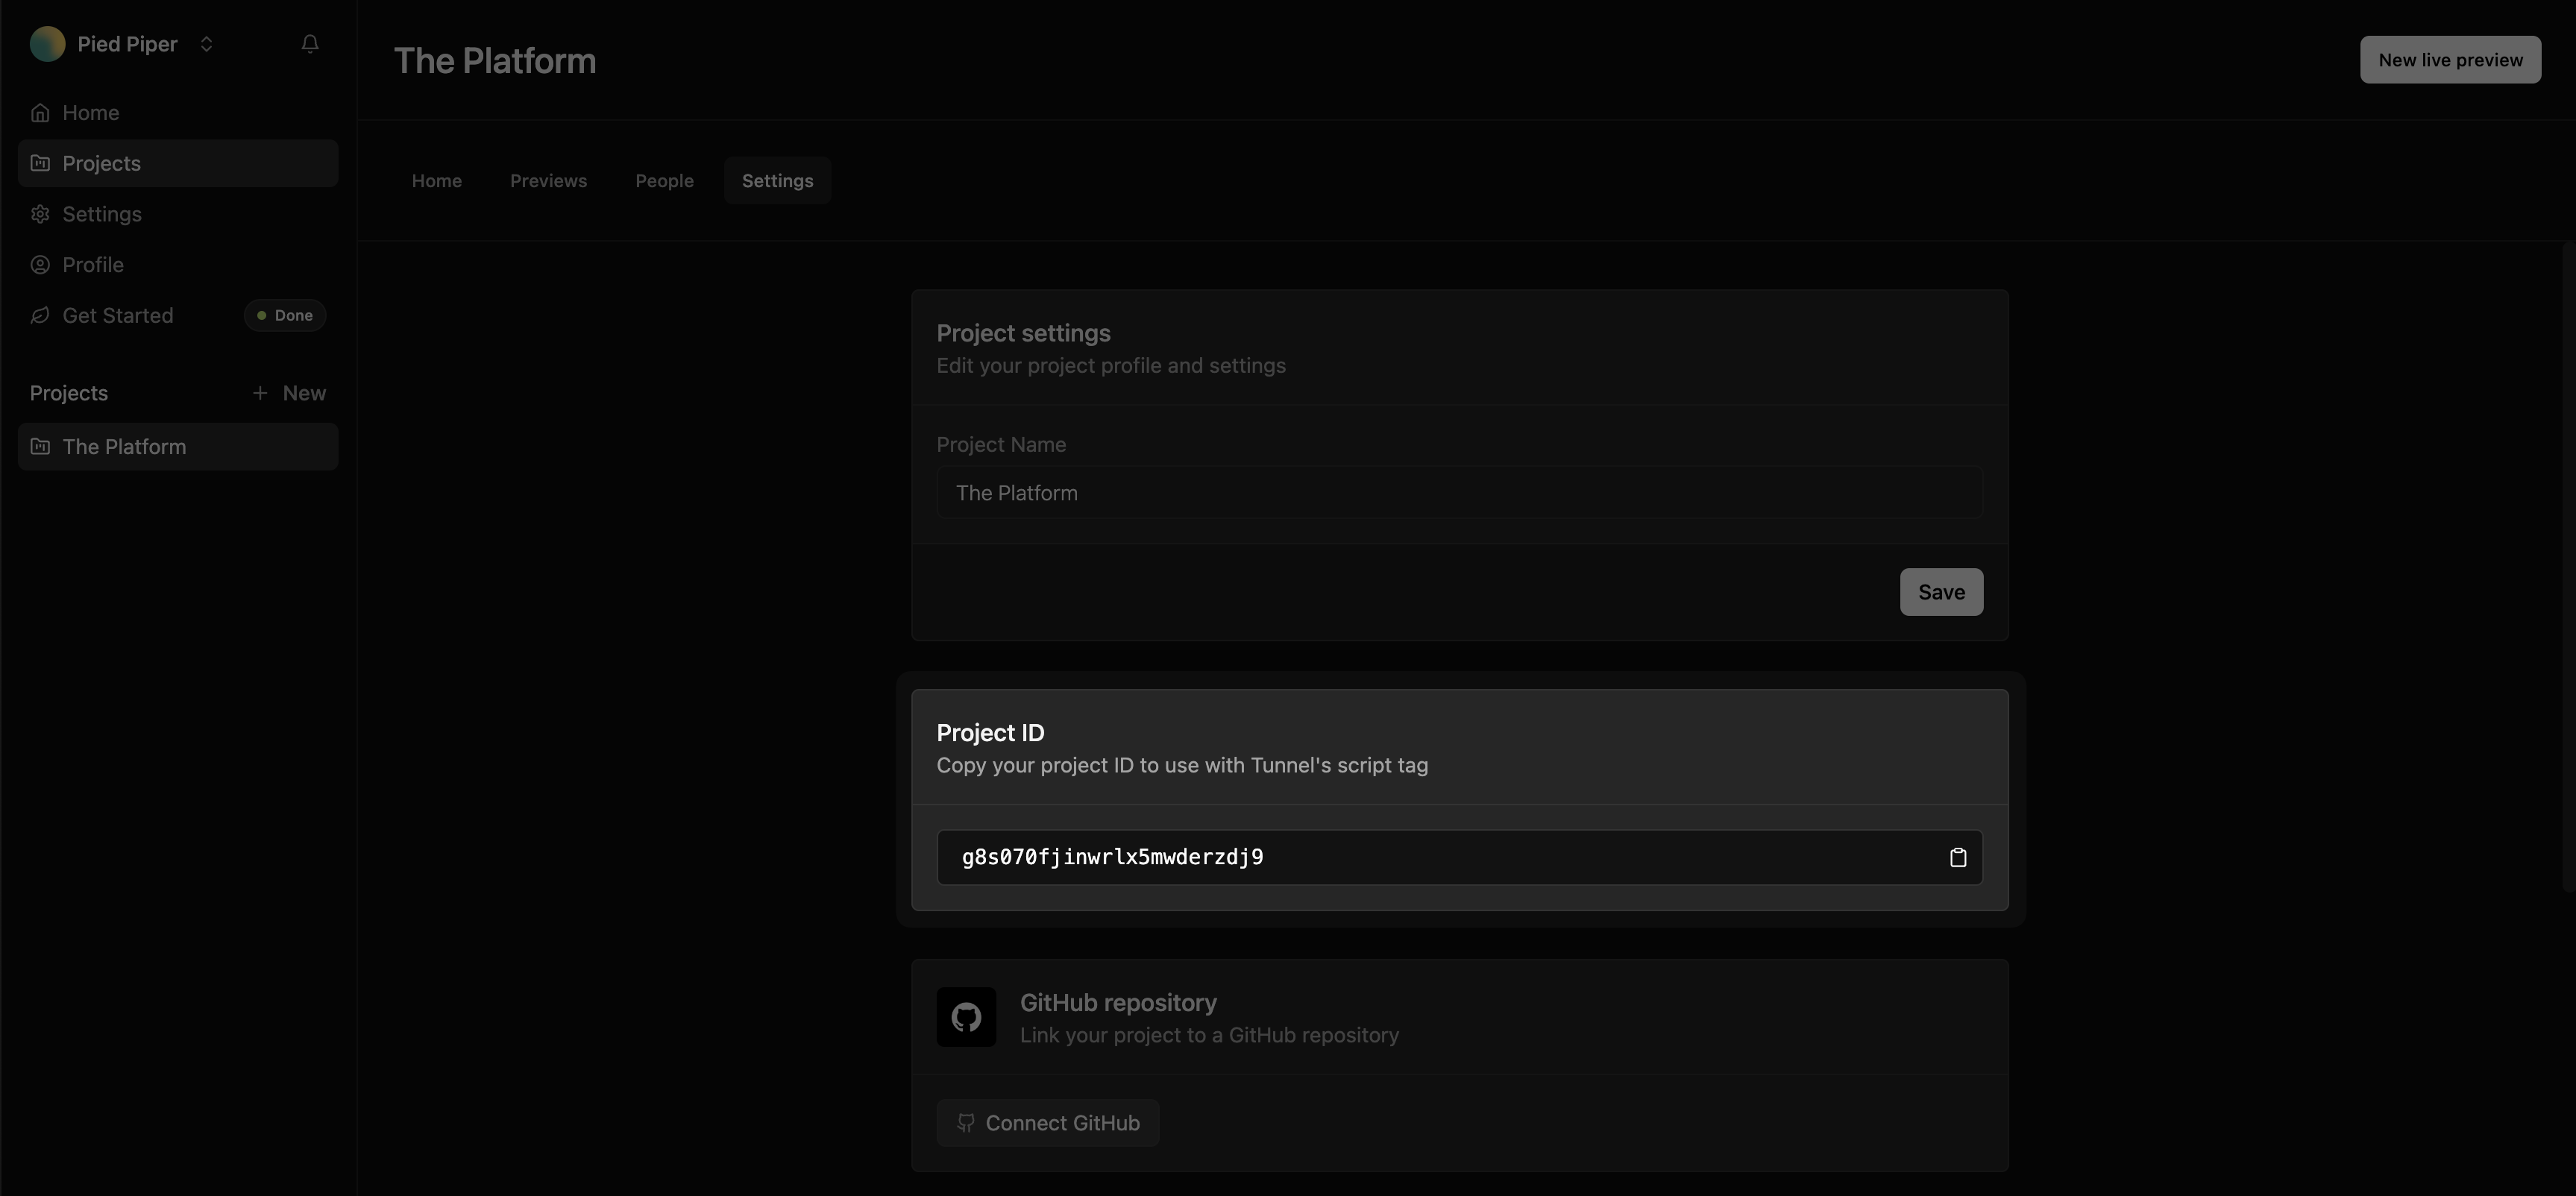
## Find your Project ID

To copy your Project ID, navigate to the [Tunnel Dashboard](https://tunnel.dev/projects), select your project, and go to **Settings** to copy your project ID.

<Frame>
  <img src="https://mintcdn.com/tunnel-19/HHvo6FC8pp1jesAt/assets/screenshots/quick-start/copy-project-id.png?fit=max&auto=format&n=HHvo6FC8pp1jesAt&q=85&s=07df1beee1f34ee921feab0994498fcd" width="3454" height="1604" data-path="assets/screenshots/quick-start/copy-project-id.png" />
</Frame>

## Add the Tunnel Toolbar to your app

To enable Tunnel in your app, add the `<TunnelToolbar />` component to your app. For now, we have specialized SDKs for React and Next.js apps, but if you're using another framework, you can still use Tunnel by adding the `<script>` tag to your app.

<Tabs>
  <Tab title="React">
    <Steps>
      <Step title="Install the Tunnel React SDK">
        For full documentation, see our [**React SDK docs**](https://docs.tunnel.dev/docs/sdks/react).

        <CodeGroup>
          ```shell npm theme={null}
          npm install @tunnel/react
          ```

          ```shell yarn theme={null}
          yarn add @tunnel/react
          ```

          ```shell pnpm theme={null}
          pnpm add @tunnel/react
          ```
        </CodeGroup>
      </Step>

      <Step title="Add the Tunnel Toolbar to your app">
        To enable Tunnel in your app, render the `<TunnelToolbar />` component in your app.

        <ParamField path="projectId" required>
          The `<TunnelToolbar />` component requires a `projectId` prop. You can find
          your Project ID in the Tunnel Dashboard by navigating to
          [**Projects**](https://tunnel.dev/projects) > ***Your Project*** >
          **Settings**.
        </ParamField>

        ```javascript App.jsx theme={null}
        import { TunnelToolbar } from '@tunnel/react';

        export default function App() {
          return (
            <Steps>
              <div>
                {process.env.NODE_ENV !== "development" && (
                  <TunnelToolbar
                    projectId={process.env.TUNNEL_PROJECT_ID}
                  />
                )};
                {/* ... */}
              </div>
            <Step>
          );
        }
        ```

        <Tip>
          The snippet above only renders the Tunnel Toolbar in development. Depending on your use case, you will want to update the conditional
          to render the toolbar in specific environments (development, staging, production) or for specific users (everyone, certain customers, or just employees).
        </Tip>
      </Step>
    </Steps>
  </Tab>

  <Tab title="Next.js (/app)">
    <Steps>
      <Step title="Install the Tunnel Next.js SDK">
        For full documentation, see our [**Next.js SDK docs**](https://docs.tunnel.dev/docs/sdks/nextjs).

        <CodeGroup>
          ```shell npm theme={null}
          npm install @tunnel/nextjs
          ```

          ```shell yarn theme={null}
          yarn add @tunnel/nextjs
          ```

          ```shell pnpm theme={null}
          pnpm add @tunnel/nextjs
          ```
        </CodeGroup>
      </Step>

      <Step title="Add the Tunnel Toolbar to your app">
        To enable Tunnel in your app, render the `<TunnelToolbar />` component in your app. The `<TunnelToolbar />` component is a React component that requires a `projectId` prop.

        <ParamField path="projectId" required>
          The ID of the project to link to. You can find your Project ID in the Tunnel
          Dashboard by navigating to [**Projects**](https://tunnel.dev/projects) >
          ***Your Project*** > **Settings**.
        </ParamField>

        ```javascript App.jsx theme={null}
        import { TunnelToolbar } from "@tunnel/nextjs";

        export default function RootLayout({ children }) {
          return (
            <html lang="en">
              <body>
                {children}
                {process.env.NODE_ENV !== "development" && (
                  <TunnelToolbar
                    projectId={process.env.NEXT_PUBLIC_TUNNEL_PROJECT_ID}
                  />
                )}
              </body>
            </html>
          );
        }
        ```

        <Tip>
          The snippet above only renders the Tunnel Toolbar in development. Depending on your use case, you will want to update the conditional
          to render the toolbar in specific environments (development, staging, production) or for specific users (everyone, certain customers, or just employees).
        </Tip>
      </Step>
    </Steps>
  </Tab>

  <Tab title="Next.js (/pages)">
    <Steps>
      <Step title="Install the Tunnel Next.js SDK">
        For full documentation, see our [**Next.js SDK docs**](https://docs.tunnel.dev/docs/sdks/nextjs).

        <CodeGroup>
          ```shell npm theme={null}
          npm install @tunnel/nextjs
          ```

          ```shell yarn theme={null}
          yarn add @tunnel/nextjs
          ```

          ```shell pnpm theme={null}
          pnpm add @tunnel/nextjs
          ```
        </CodeGroup>
      </Step>

      <Step title="Add the Tunnel Toolbar component to your app">
        To enable Tunnel in your app, render the `<TunnelToolbar />` component in your `_app.jsx` file. The `<TunnelToolbar />` component is a React component that requires a `projectId` prop.

        <ParamField path="projectId" required>
          The ID of the project to link to. You can find your Project ID in the Tunnel Dashboard by navigating to [**Projects**](https://tunnel.dev/projects) > ***Your Project*** > **Settings**.
        </ParamField>

        ```javascript _app.jsx theme={null}
          import { TunnelToolbar } from '@tunnel/nextjs';

          export default function MyApp({ Component, pageProps }: AppProps) {
            return (
              <>
                <Component {...pageProps} />
                {(process.env.NODE_ENV !== "development") && (
                  <TunnelToolbar
                    projectId={process.env.NEXT_PUBLIC_TUNNEL_PROJECT_ID}
                  />
                )}
            );
          }
        ```

        <Tip>
          The snippet above only renders the Tunnel Toolbar in development. Depending on your use case, you will want to update the conditional
          to render the toolbar in specific environments (development, staging, production) or for specific users (everyone, certain customers, or just employees).
        </Tip>
      </Step>
    </Steps>
  </Tab>

  <Tab title="Other frameworks">
    <Steps>
      <Step title="Add the Tunnel `<script>` tag to your app">
        To enable Tunnel in your app, render the `<script>` tag.

        <ParamField path="data-project-id" required>
          The Tunnel `<script>` tag requires a `data-project-id` attribute. You can find your Project ID in the Tunnel Dashboard by navigating to [**Projects**](https://tunnel.dev/projects) > ***Your Project*** > **Settings**.
        </ParamField>

        ```html index.html theme={null}
        <script
          src="https://tunnelapp.dev/__tunnel/script.js"
          data-project-id="PROJECT_ID"
        ></script>
        ```
      </Step>
    </Steps>
  </Tab>
</Tabs>

## Deploy!

You're all set! Now you can start using Tunnel in your app. Deploy your app to a preview environment to see the Tunnel Toolbar in action.

<Frame>
  <img src="https://mintcdn.com/tunnel-19/HHvo6FC8pp1jesAt/assets/screenshots/quick-start/staging-screenshot.png?fit=max&auto=format&n=HHvo6FC8pp1jesAt&q=85&s=3022a3310f9ebe9a9d004cdeb75b5542" width="3456" height="1714" data-path="assets/screenshots/quick-start/staging-screenshot.png" />
</Frame>
