

Find your Project ID
To copy your Project ID, navigate to the Tunnel Dashboard, select your project, and go to Settings to copy your project ID.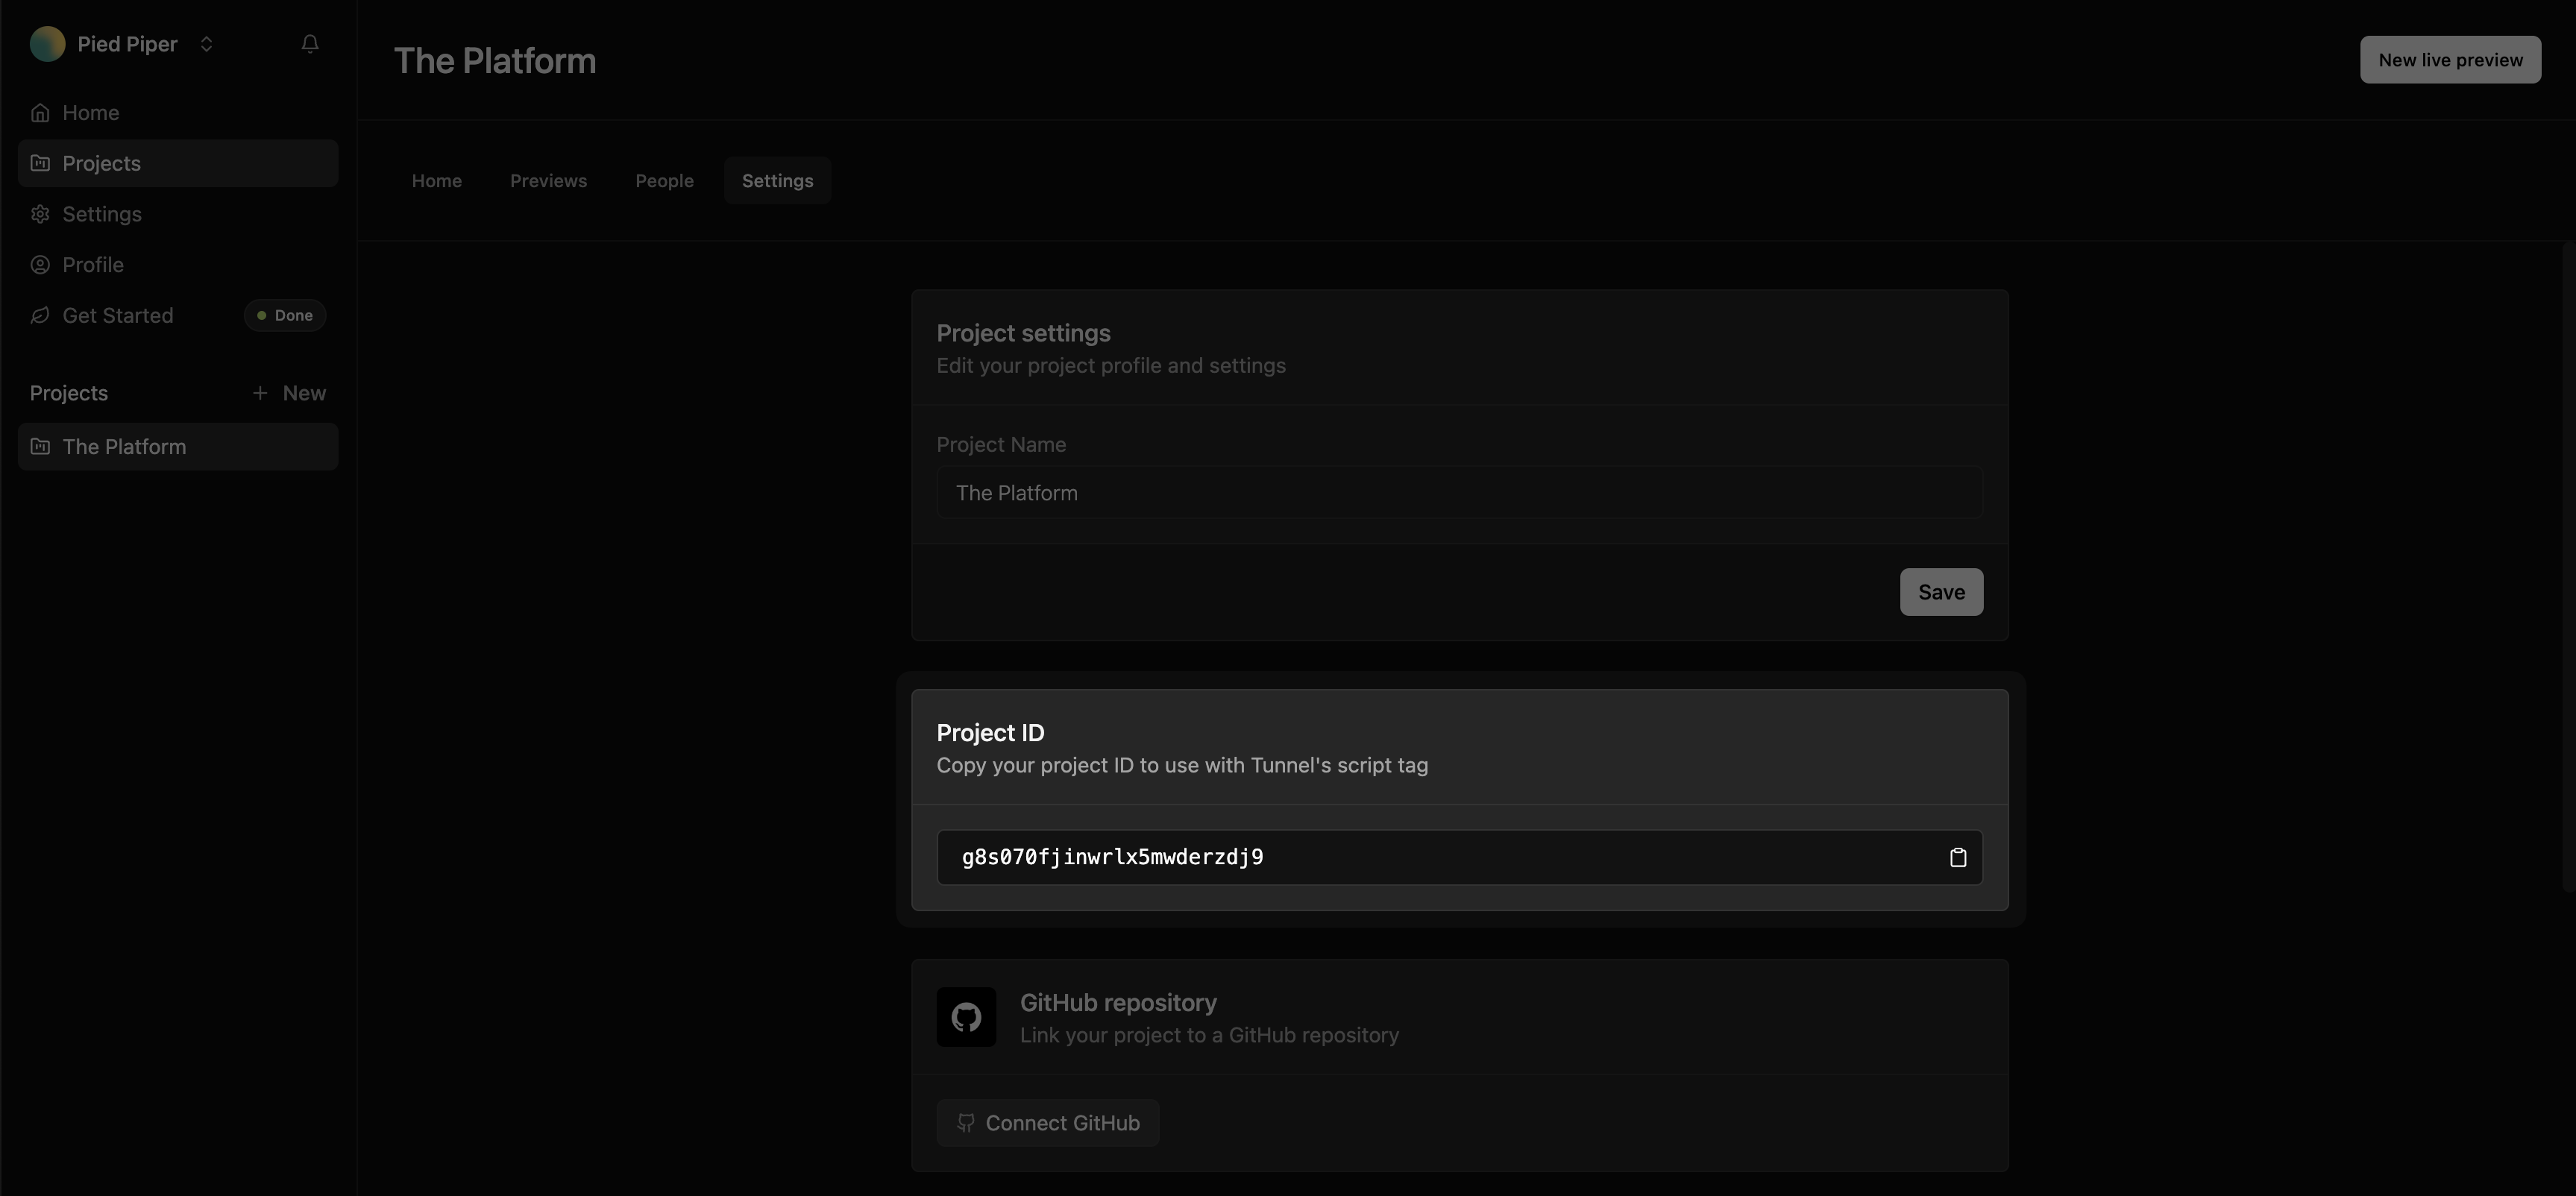
Add the Tunnel Toolbar to your app
To enable Tunnel in your app, add the<TunnelToolbar /> component to your app. For now, we have specialized SDKs for React and Next.js apps, but if you’re using another framework, you can still use Tunnel by adding the <script> tag to your app.
- React
- Next.js (/app)
- Next.js (/pages)
- Other frameworks
1
Install the Tunnel React SDK
For full documentation, see our React SDK docs.
Deploy!
You’re all set! Now you can start using Tunnel in your app. Deploy your app to a preview environment to see the Tunnel Toolbar in action.